Navigation
Install the app
How to install the app on iOS
Follow along with the video below to see how to install our site as a web app on your home screen.

Note: this_feature_currently_requires_accessing_site_using_safari
More options
- Take 30 seconds to register your free account to access deals, post topics, and view exclusive content! Register TodayJoin the largest Oakley Forum on the web!You are using an out of date browser. It may not display this or other websites correctly.
You should upgrade or use an alternative browser.Lighting my 1.0 countertop case
- Thread starter MicahS
- Start date
Very cool brother, like how you soldered up each leg for a clean look.
Did you use any of that Aluminum conduit for mounting the LED strip?Looks great
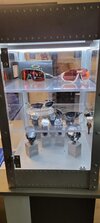
it looks like he used the conduit/panels on the corners to hold up the assembly. curious, how did you route the wire to the battery, and is it dimmable?Very cool brother, like how you soldered up each leg for a clean look.
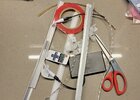
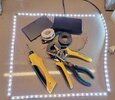
Did you use any of that Aluminum conduit for mounting the LED strip?I used some rail and corner pieces I picked up from amazon.
As for how its mounted, I just used double sided gel tape so its thin and fairly invisible. I'll probably come up with a better solution in the future, before I do my other one, but that's a quick easy to remove option.
@dragonvoi Those rails you mentioned are actually part of the case. They are there to capture the plexiglass between them and the outer rail. They mount into a notch cut in the base and top of the case. I ground of about 1/8" from the corner of the notch (shown in red below) on the top to allow a passthrough for the wires of the light into the top compartment of the case. I put that notch in the front corner so if your looking at the case from the front, like you should be, you wont notice the small hole up there if I were to ever remove the lights.
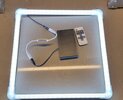
The remote I bought is also a dimmer so I can adjust them to exactly where I want them.
These case disassemble really easily. 8 of the "rivets" on the top section are actually bolts. Once you remove them the whole thing can be disassembled. To get to them you need to remove the top cover, which is held on with 4 button head screws, then you can remove the bolts, the the top section pulls out, the plexiglass can be removed from the top, the 4 containment rails come out and your done.
As I found out recently this style case must have had two versions. One with a spinning display mounted between two lazy Susan's mounted to the top and bottom, and another that just had shelves. The "shelf kit" ,as Ill call it, had another set of rails that mount to the inside of the case rails to provide the pins to hold the shelves. these were held on by double sided tape so they didn't collapse inward when you take the selves out. oddly on both my cases they never took the backing off the tape so it really did nothing.
When I do the other case I'll take some pictures of the disassembly/assembly as I'll guess some of the other x-metal style cases come apart in the same way.lloydrose
I should Work at Oakley
Looks awesome!Similar threads
- Replies
- 12
- Views
- 4K
- Replies
- 7
- Views
- 3K
- Replies
- 17
- Views
- 3K
- Replies
- 7
- Views
- 17K
- Replies
- 9
- Views
- 13K


